Universal Analytics and Google Tag Manager
tag on all of your websites pages.
Excerpt
Google Tag Manager (GTM) is a tag management system that allows users to implement a snippet of code (known as a container tag) on their website/mobile app. This container tag gives the user the ability to deploy various types of analytics code to their project without additional hard coding. Not only does this limit on-page/in-app development, but it also provides a very efficient way of pushing code to your project in a consistent manner. This post won’t explore all of the features of the tag management system, but it will guide users on upgrading or implementing Universal Analytics on their website via GTM.
Important:
- If you already have Google Analytics code on your website, then make sure to remove that code right after you publish your new Universal Analytics code to your website. You never want to double tag your website.
- This is a guide for very basic websites setups and not for e-commerce sites or sites that have advanced use of Google Analytics features.
Step 1) Create a Google account or login with your Google account.
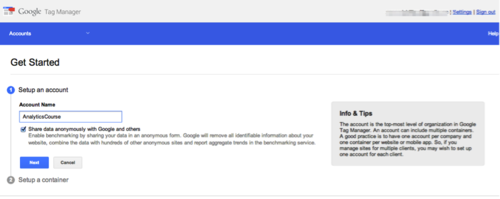
Step 2) Once you are registered or logged in, click “create a new account” and name it after your project.
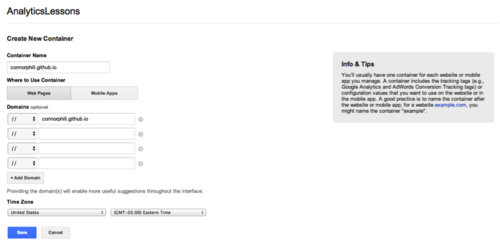
Step 3) Create a name for your container tag and select whether the project is a web page or mobile app. For this example, we will be using GTM for a web page.
-It is best practice to name your container after your website or mobile app.
What is a container tag?
A container tag is one tag that you implement on your website that contains and triggers multiple tracking tags. Tracking tags like: Google Analytics, AdWords conversion, event tracking, etc.
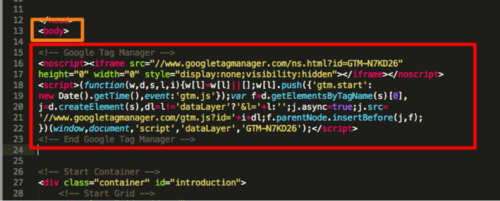
Step 4) Add your container tag just after the opening
tag on all of your websites pages.

-On the GTM website, you will be provided a snippet of code that will be your container tag. This tag should not be altered and should be dropped on your website just after you open your
. After you have implemented this code, then click “Add Tags Later”.
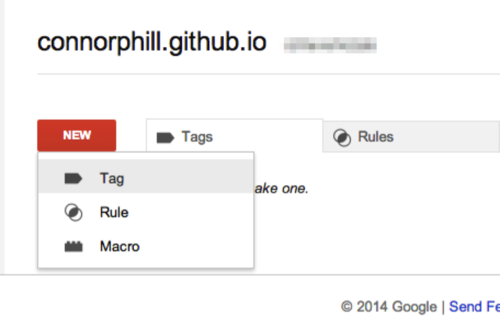
Step 5) Once the container code snippet is dropped on your website and you have clicked “Add Tags Later”, you will be brought to your tag manager dashboard. This is where you will create all of your tracking tags that will be deployed through the container tag on your website. To create your Universal Analytics tag, click “NEW”.
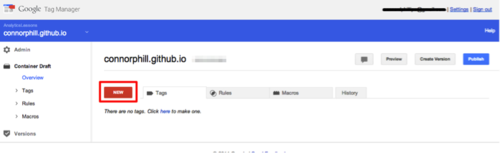
-This will then bring up three options, “Tag”, “Rule”, and “Macro”. Choose “Tag”.
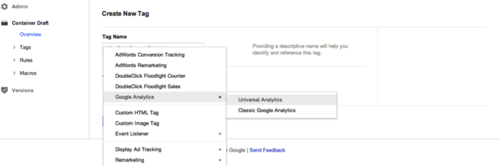
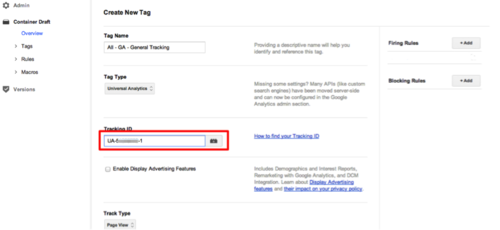
Step 6) Name your tag, choose a “Tag Type” and then add your tracking ID.
-The naming convention I use when naming tags is:
“All (or page where tag will fire) – Type of tag (Google Analytics) – Name of tag.”
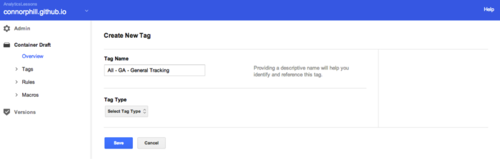
-Then select the tag type you want. For this blog post it is “Universal Analytics”.
-Finally add your tracking ID to make sure that the data is being sent to your account.
Step 7) Add your firing rule.
What is a firing rule?
-A firing rule tells your container when to trigger your tag. For this example, we want our Universal Analytics tag to fire on all pages. In order to do so, click “+Add” in the “Firing Rules” column.
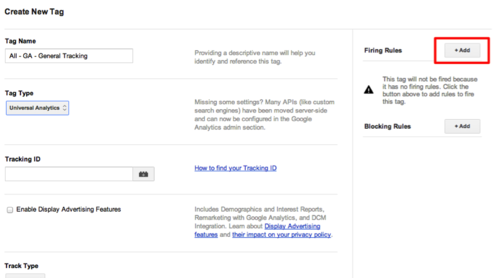
-Then choose the default, “All Pages” rule. This rule will make sure that our tag fires on all of our pages.

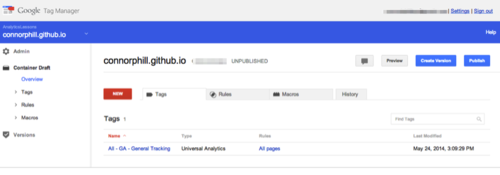
Step 8) Save your tag.
-Click save and your tag and rule will now be created.
Step 9) Create a version of your container that contains your newly created general tracking tag and then click debug to make sure that your new tag is firing correctly.
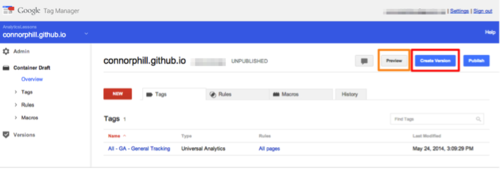
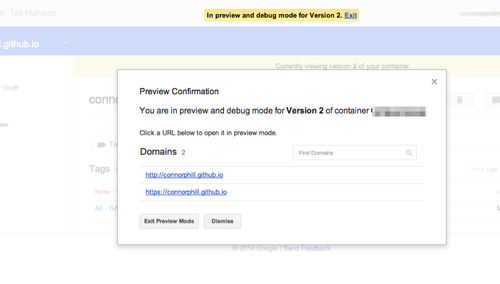
-Click Preview and then “Debug”
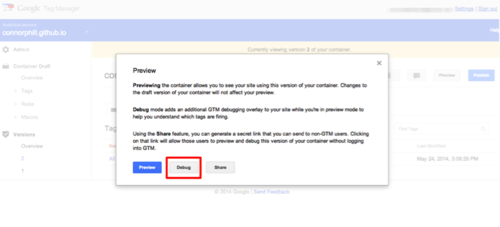
-You can then click through to your website with the domain link provided.
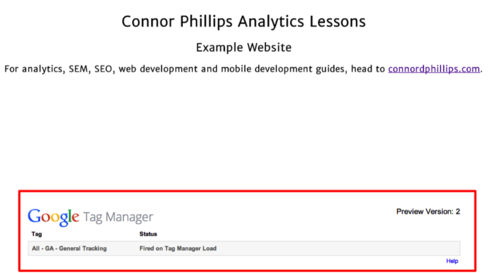
Step 10) Make sure that your tag is firing correctly and registering to your account.
-When in “Debug” mode and viewing your website, you will see a Google branded box appear at the bottom of your page. This box will show all of the tags contained within your container tag and which have been triggered. If you see the “Status”, “Fired on Tag Manager Load” when your page has been loaded, then we know that our firing rule is being triggered correctly.
-To ensure that our cookies are firing correctly, then we need to check our browser console. First find the gtm.js cookie to make sure that our Google Tag Manager cookie is firing.
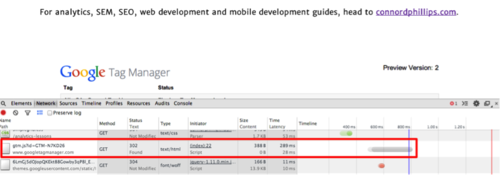
-Then check to make sure that the Universal Analytics pageview cookie is firing. Look for collect?v= to find the pageview cookie.
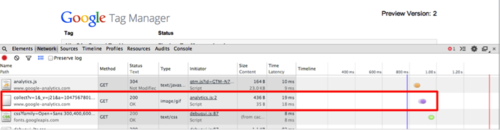
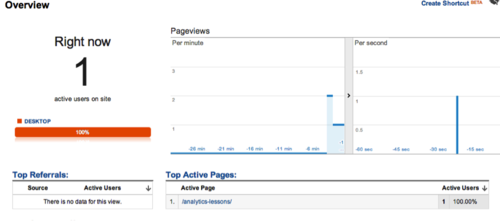
-Finally check your Google Analytics dashboard to see if your data has been tracked.
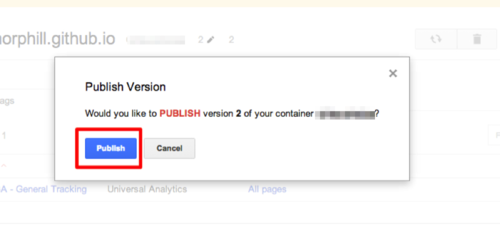
Step 11) Publish this container version and you have finally added Universal Analytics to your website.
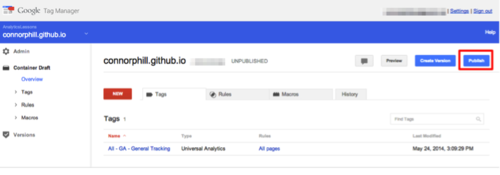
-Click “Publish” and you are all done.
In only eleven steps you have successfully created a Google Tag Manager account and upgraded your website to the latest version of Google Analytics. If you ran into any issue at any point during this guide, then please comment below and I will help you troubleshoot your issue.